You want your stickers to look sharp and stick well. Choosing the right release liner paper for stickers helps you get there. The release liner keeps the adhesive safe and makes peeling easy. Pay attention to every step. This way, your stickers come out looking clean and professional.
Key Takeaways
Pick the best release liner paper for your sticker. Use paper liners for labels. Use film liners if you need moisture resistance.
Make sure your design files look good. Use vector formats. Set the resolution to 300 DPI. Add a bleed area for neat cuts.
Clean the surface before you put on stickers. This helps the adhesive stick well. It also stops air bubbles from forming.
Choose Release Liner Paper for Stickers
Material Compatibility
You want your stickers to last and look nice. The right release liner paper for stickers is important. Not all liners work with every sticker material. Vinyl, paper, and plastic stickers each need a matching liner. Most release liners use virgin paper with a thin silicone layer. This layer makes stickers easy to peel off. It also keeps the adhesive safe until you use the sticker. Silicone liners are common, but they are hard to recycle. If you care about the planet, you can pick silicone-free liners or recycled ones.
Here’s a quick look at how different liners work with sticker materials:
| Liner Type | Advantages | Applications |
| Paper | Great print quality, affordable, eco-friendly | Labels, graphic arts |
| Film | Resists moisture, stays stable | Automotive, electronics, medical |
Thinner liners are getting more popular now. They help you put labels on smoothly and in the right spot. Thinner liners also use less material, so there is less waste.
Quality Matters
Good release liner paper for stickers helps you avoid printer jams. It also stops you from wasting materials. Liners made with care move smoothly through printers. You get clean prints and sharp edges. Premium liners cost more, but they last longer and work better. Glassine liners are thin and strong, but they cost more than clay-coated kraft liners.
Check these quality signs when you pick a release liner:
| Indicator | Description |
| Dry Silicon Coating Amount | Controls peel performance. |
| Normal Temperature Peeling Force | Shows how easy it is to peel. |
| Aging Peeling Force | Measures peel strength over time. |
| Residual Adhesion Rate | Tells you how well the liner protects the adhesive. |
Good liners help your labels work better and keep your stickers looking great.
Prepare Design and Printer
Self-Adhesive Printable Stickers
You want your stickers to look crisp and colorful. Start by choosing the right design file format. Vector files like .ai or .eps give you sharp edges and smooth lines. If you use raster images, make sure they are at least 300 DPI. This keeps your stickers from looking blurry or pixelated. Always set your artwork to CMYK color mode for true-to-life colors. Add a bleed area of 0.125 to 0.25 inches around your design. This extra space helps you avoid white edges after cutting.
Here’s a quick checklist for your design files:
Use vector formats for best quality.
Set resolution to 300 DPI or higher.
Choose CMYK color mode.
Add a bleed area for clean cuts.
You can use TIFF, PDF, or JPEG files, but check the size and color settings before printing.
Printer Settings
Your printer setup matters just as much as your design. Select the right paper type, like "Sticker Paper" or "Labels," in your printer menu. Pick the highest print quality setting. If you want edge-to-edge designs, enable borderless printing. Set page scaling to 100% so your stickers print at the correct size.
Tip: Clean your printer before you start. Shake ink cartridges, clean printheads, and check nozzles. Wipe down the outside to keep dust away.
Align your paper guides carefully. Run a test print on plain paper to check alignment. Place your sticker sheet over the test print to see if everything lines up. Store your release liner paper for stickers flat and use the bypass tray for a straighter path. Don’t overload the tray. These steps help you avoid jams and crooked prints with self-adhesive printable stickers.
Cutting Techniques
Leave Margins
You want your stickers to look sharp and professional. One simple trick is to leave enough space around your design. If you put important text or images too close to the edge, you might cut them off by mistake. Here’s what you should do:
Keep a safety area of .125 to .25 inches from the edge of your stickers.
Make sure no important details touch the border.
Use this space to help your stickers look balanced and clean.
Tip: White space around your design makes your stickers easier to read and gives them a polished look.
Clean Edges
Clean edges make your stickers stand out. You can use different tools and machines to get the best results. Check out this table to see which cutting techniques and machines work well:
| Cutting Technique | Description | Recommended Machines |
| Die-Cutting | Offers precise shapes by cutting through the material. | Silhouette Cameo 4, Cricut Explore Air 2 |
| Kiss-Cutting | Cuts through the top layer while leaving the backing intact. | Brother ScanNCut SDX125E |
| Through-Cutting | Cuts all the way through the material and backing. | USCutter MH Series |
You can pick the machine that fits your needs and budget. Always check your design before cutting. Here are some common mistakes people make when cutting stickers and how to avoid them:
Use fonts that are at least 6 points so everyone can read your stickers.
Don’t crowd your stickers with too much information. Leave some white space.
Proofread your stickers to catch spelling or grammar mistakes.
Pick the right adhesive so your stickers last longer.
Print a sample sticker first to make sure everything looks right.
If you follow these tips, your stickers will have smooth edges and a professional finish.
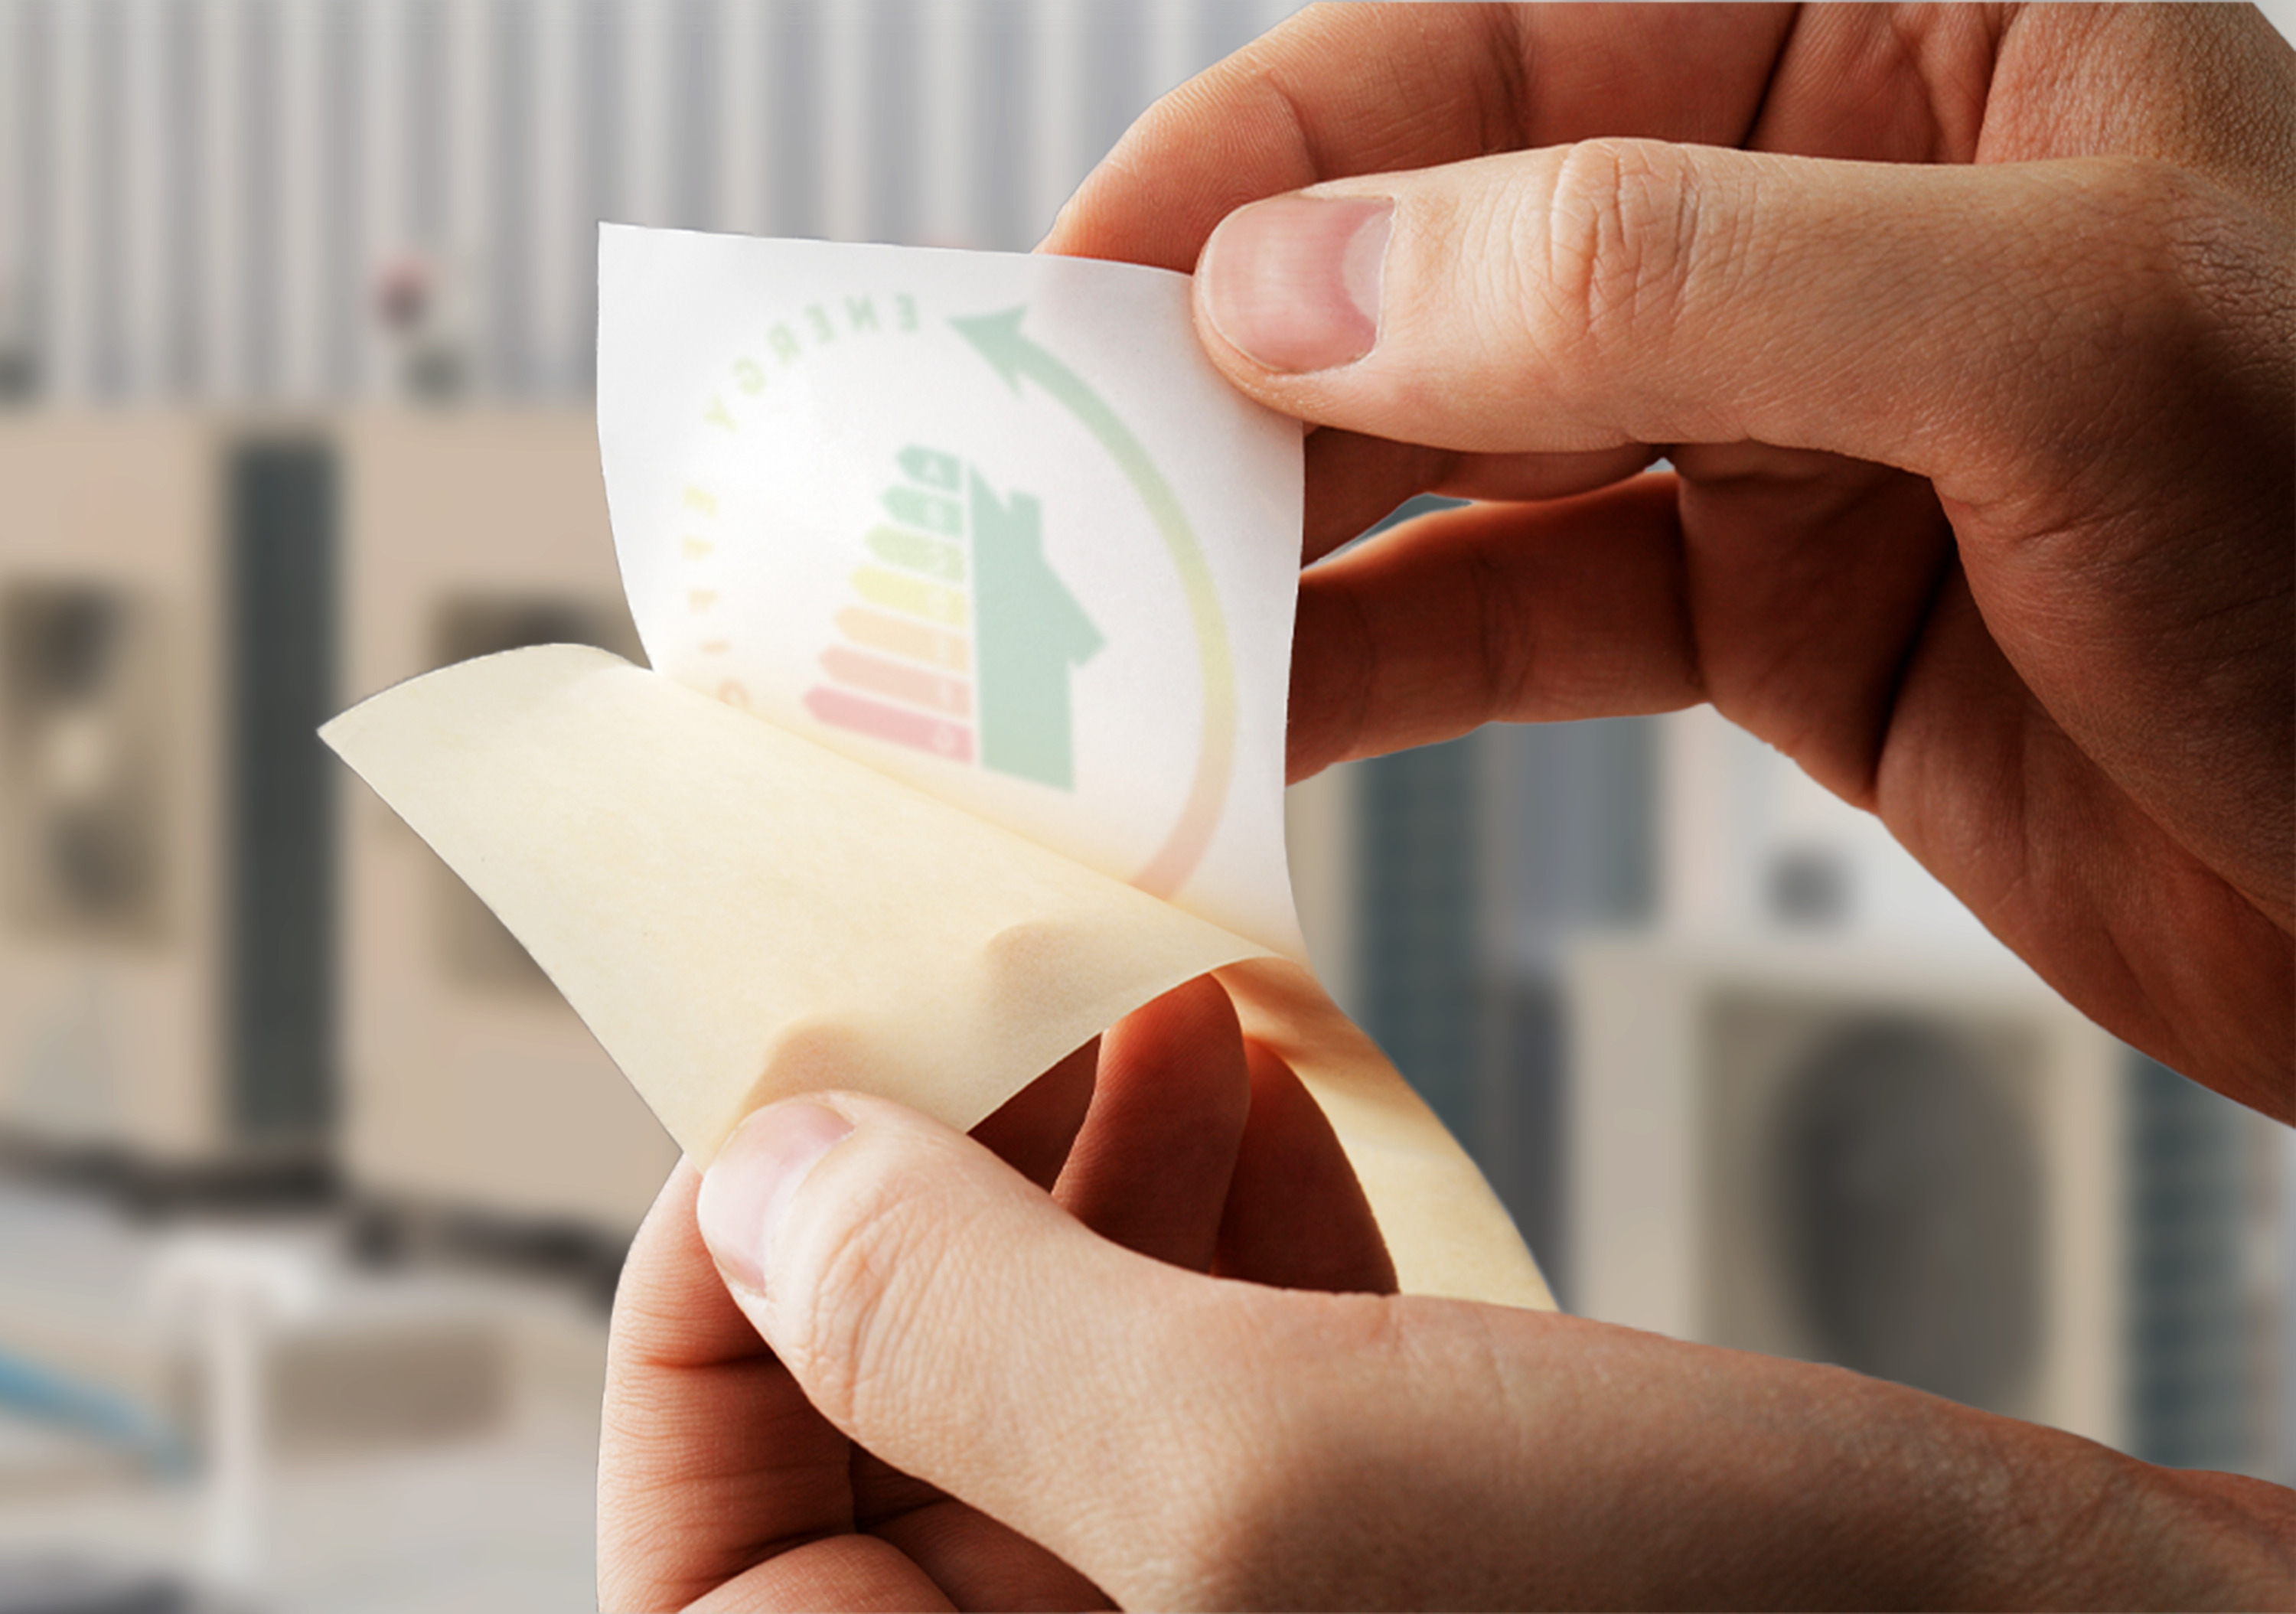
Peeling and Application
Image Source: pexels
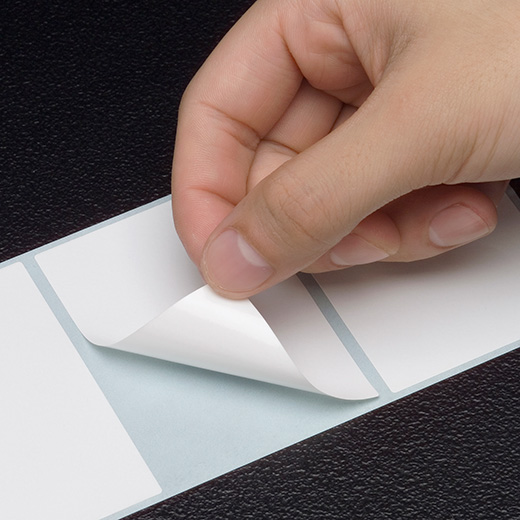
Easy Peeling
You want to peel your stickers without any trouble. Start by bending the sheet gently to loosen the edge. The release liner paper for stickers makes this step much easier. Peel the backing slowly and avoid pulling too hard. This keeps your sticker from stretching or tearing. If you have a large sticker, try peeling just a small part of the backing first. Line up the edge where you want to place it. Press down gently with your fingers or a squeegee. Keep peeling the backing as you press the sticker onto the surface. This way, you keep the sticker flat and smooth.
Tip: Always peel in a clean, dry area. Dust or moisture can ruin the adhesive and make your stickers less sticky.
Smooth Application
You want your stickers to look perfect after you apply them. Clean the surface first. Wipe away dust, grease, or any dirt. This helps the adhesive stick better. For best results, use the hinge method. Place a piece of masking tape along one edge of the sticker to create a hinge. Lift the sticker, peel off the backing, and press it down while smoothing with a squeegee or a credit card. Start from the center and work out to the edges. This pushes out any air bubbles.
If you have a big sticker, try the wet method. Spray a little water mixed with soap on the surface. Place the sticker, then use a squeegee to push out the water and bubbles. Let the sticker set for 24 to 48 hours for a strong bond. Avoid applying stickers in very hot, cold, or humid places. High humidity can make the adhesive weak, while low humidity can make it brittle. Choose a dry, mild day for the best results.
Troubleshooting
Adhesion Issues
You might notice your stickers don’t stick well or peel off too easily. This can happen for a few reasons.
You could be using the wrong type of liner. Paper liners sometimes tear during die cutting, while film liners last longer but need special tools.
The release strength might not match your needs. If the liner is too strong or too weak, stickers can be hard to peel or fall off too soon.
The liner thickness matters. Thicker liners help stickers keep their shape, but they can make application tricky.
Tip: When you choose a liner, think about how you want the adhesive to release. A thicker liner can stop stickers from feeling flimsy. Adjust the release strength if you notice problems during digital label printing.
Print and Cut Problems
Sometimes, stickers don’t line up right after printing and cutting. You might see uneven borders or colors that look off.
Here’s a quick table to help you spot common issues:
| Problem | Explanation |
| Misregistered cutting | The cut doesn’t match the design, so borders look uneven. |
| Too much ink | Extra ink can make the surface bumpy, called ‘orange peel’. |
| Incorrect colors | Colors look wrong because of artwork settings or printer limits. |
You can fix these problems by checking your printer settings.
Always set your printer to actual size for digital label printing.
Align the print head using your printer’s software.
Clean the cassette tray and paper guides to remove dust and sticky residue.
Try a test print before making a full batch of stickers.
Note: If you keep having trouble, ask a professional for help with alignment or cutting.
You’ve learned five key steps for flawless stickers. Try different materials like vinyl for outdoor use or paper for indoor projects. Gloss and matte finishes add style to custom stickers. Experiment with new techniques. When you see your stickers looking perfect, you’ll feel proud of your work.
FAQ
What is release liner paper?
Release liner paper is a special backing for stickers. It keeps the adhesive safe and lets you peel stickers off easily when you want to use them.
Can I print on both sides of release liner paper?
No, you should only print on the sticker side. The liner side is slippery and will not hold ink or toner.
Why do my stickers sometimes curl after cutting?
Your stickers might curl if you use too much heat or pressure when cutting. Try lowering the settings on your cutting machine for better results.


