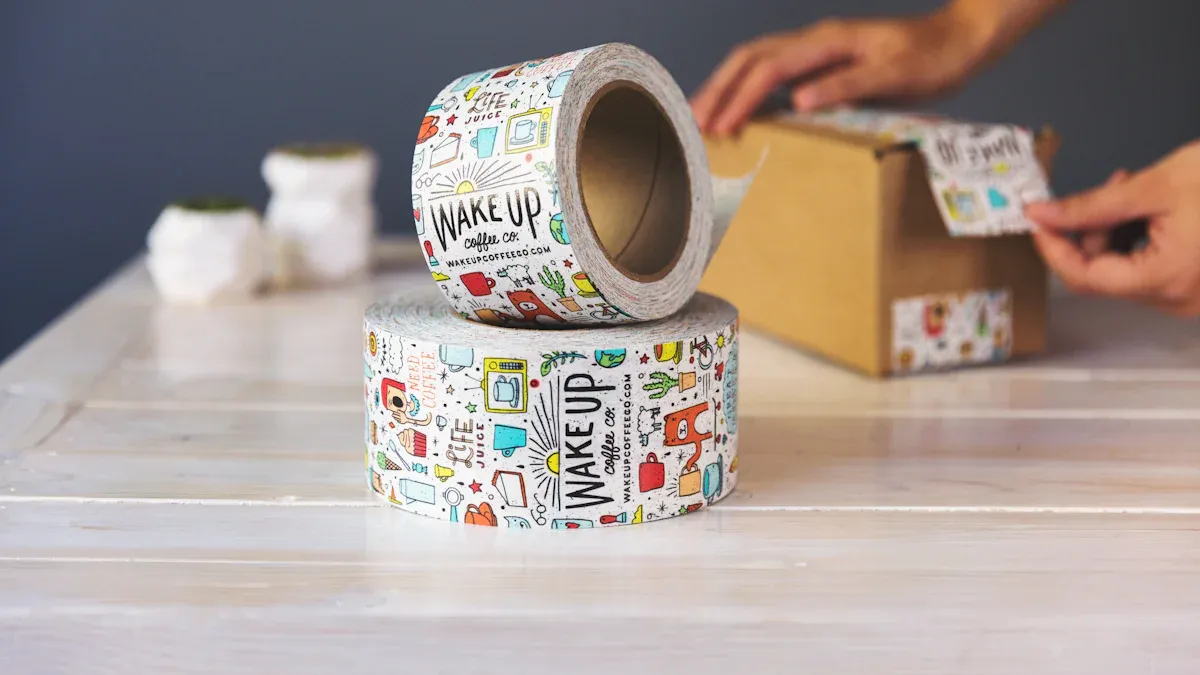
Imagine you want to make your own stickers or labels. You need sticky roll paper that fits your project and looks right. People use sticky roll paper for scrapbooking and home décor. It is also used for car painting and wall stencils. Try different ways to use it for the best results.
Key Takeaways
Pick sticky roll paper that fits your project. Think about things like waterproofing and finishes. These features can make your designs better.
Clean the surface before you use sticky roll paper. A clean spot helps the paper stick well. It also makes stickers or labels last longer.
Use the right way to put on sticky roll paper. This helps stop bubbles from forming. Begin in the center and smooth it out to the edges. This gives a neat look.
Choosing Sticky Roll Paper
Features
When you pick sticky roll paper, you should match it to your project. Think about what you want to make first. Do you want bright colors or a soft look? Do you need your stickers to last outside or just inside? Here are some features that can help you choose:
Feature
Description
Printer Compatibility
Make sure the paper works with your printer, like inkjet or laser.
Waterproofing
Pick water-resistant or waterproof paper for outdoor or kitchen uses.
Finishes
Glossy gives bright colors and shine. Matte looks soft and does not reflect light.
Weights
Standard weight is good for most projects. Cardstock weight is thicker for special uses.
Specialty Options
Try holographic or iridescent finishes for creative projects.
The finish you pick changes how your stickers or labels look. Glossy finishes make colors bright and shiny. Matte finishes look calm and smooth. You can also find sticky roll paper with cool effects, like holographic or 3D, for special projects.
Tip: If you want your stickers to last longer, pick waterproof or UV-resistant finishes. These choices help your designs stay nice and strong.
Types: Vinyl and Adhesive Permanent Vinyl
There are many types of sticky roll paper, but vinyl is the most popular. Vinyl is bendy, tough, and sticks well to many things. It comes in two main types: regular vinyl and adhesive permanent vinyl.
Vinyl: This type is easy to cut and weed. You can use it for wall decals, window art, and temporary labels. It works well for projects that may need to change later.
Adhesive permanent vinyl: This type is made for long-lasting applications. It has strong adhesion and resists water, sunlight, and scratches. Use it for car decals, outdoor signs, and items that get a lot of handling.
Vinyl is great because it lasts a long time and can be used in many ways. You can use it on glass, metal, plastic, and wood. It works for both professional and diy projects. If you want to make custom stickers with a 3D effect, try 3D UV DTF transfer stickers or 3D embossed stickers. These stickers feel raised and work on many surfaces.
Sticker Type
Features
3D UV DTF Transfer Sticker
Custom patterns, 3D effect, waterproof, scratch-proof, strong adhesion.
3D Embossed Stickers
Raised look, glossy finish, can be cut into custom shapes.
Some special vinyl types cost more, but they last longer and look unique. Regular vinyl is cheaper and good for making lots of stickers.
Note: Specialty vinyl options cost about $0.50-$0.65 per square meter. Standard vinyl options cost about $0.01-$0.02 per piece.
Compatibility
You need to check if your sticky roll paper works with your printer and the surface you want to use. Here are some things to remember:
The material matters. Paper, plastic, and vinyl all have different strength and resistance.
Smooth surfaces help vinyl stick better. Rough or dirty surfaces can make it peel off.
Odd shapes may not stick well to bumpy surfaces.
Clean the area before you stick anything. Dust and water can stop the sticky part from working.
Temperature matters. Most sticky papers work best at room temperature.
Humidity and sunlight can change how long your stickers last.
Think about how long you want your stickers to stay. For permanent uses, pick adhesive permanent vinyl.
Tip: Store your vinyl rolls standing up and away from heat or sunlight. This keeps the sticky part strong and stops it from bending.
Some brands are known for being good and easy to use. Maxstick and Iconex are top picks for professional projects. If you want to save money, try HP Sprocket or Kodak Premium sticky-backed Zink photo paper. These brands give good print quality and stick well without costing too much.
You might have some problems when picking sticky roll paper. Make sure the size fits your printer. Check the coating so your images look sharp and colors are bright. Try to balance cost and quality so you do not waste materials.
Eco-friendly tip: If you care about the planet, look for sticky roll paper made from recyclable or plant-based materials. These choices help cut down on waste and pollution.
Using Sticky Roll Paper
Application Steps
Getting a smooth finish with sticky roll paper or vinyl starts with the right steps. If you want your stickers, labels, or wall art to last, you need to follow a careful process. Here’s how you can get the best results and avoid bubbles or peeling:
Clean the Surface: Wipe down the area where you plan to stick your vinyl. Dust, oil, or moisture can weaken the adhesive and reduce durability.
Prep the Surface: If you’re working on walls, patch any holes and sand rough spots. For textured walls, a skim coat helps. Let the surface dry completely.
Let the Material Adjust: Place your sticky roll paper or vinyl in the room for at least 24 hours. This helps it adjust to the temperature and humidity, which improves application.
Measure and Cut: Use a ruler and a sharp pair of scissors or a precision cutter. Always print your design before cutting to make sure everything lines up.
Peel and Stick: Start peeling from one edge. Avoid touching the sticky side to keep the adhesive strong. Line up your vinyl or adhesive permanent vinyl carefully.
Apply from the Center Out: Press the vinyl down in the center first, then smooth it outward. This technique pushes out air and prevents bubbles.
Smooth It Out: Use a squeegee or a ruler to press the vinyl flat. Move slowly and check for bubbles as you go.
Check the Edges: Press down the edges to make sure they stick well. If you see any peeling, press again or use a little extra adhesive for strong adhesion.
Tip: For tricky surfaces, use transfer tape application. This helps you move your vinyl design without stretching or tearing it.
Tools and Techniques
You don’t need fancy equipment to get professional results with sticky roll paper or vinyl. The right tools and techniques make a big difference in your application and the durability of your project.
Essential Tools:
Sharp scissors or a precision cutter for clean edges
Flat, clean work surface for better control
Squeegee or ruler to smooth out the vinyl
Thermal printer for adhesive-backed rolls
Transfer tape for moving designs
Best Techniques:
Print your design before cutting. This keeps everything lined up.
Use sharp blades to avoid tearing the vinyl or adhesive permanent vinyl.
Cut on a flat surface for better accuracy.
Leave the backing on until you’re ready to apply.
Clean the surface before you start. This boosts durability and helps the vinyl stick.
Peel slowly from one edge to avoid bending or stretching.
Apply from the center outward. This application technique pushes out air and keeps bubbles away.
Avoid touching the sticky side. Oils from your fingers can weaken the adhesive and hurt durability.
Common Mistakes to Avoid:
Don’t rush the application. Take your time to line up the vinyl.
Don’t touch the sticky side. This can ruin the adhesive.
Don’t store sticky roll paper or vinyl in hot or humid places. This can make it lose its stickiness.
Don’t print too many labels at once. Print as needed to keep the adhesive permanent and fresh.
If you want to create a 3D effect, try using foam pads or 3D glue dots. Foam pads give a big lift for card toppers or large stickers. 3D glue dots work well for smaller projects or when you want to add layers without too much thickness. Both options help you build up your design and make it stand out.
DIY Project Ideas
Sticky roll paper and vinyl open up a world of crafting and diy possibilities. You can use them for both simple and advanced projects. Here are some fun ideas to try:
Project Idea
Description
Personalized Stickers
Print your own designs and cut them out for water bottles, laptops, or notebooks.
Custom Labels
Make labels for jars, storage bins, or school supplies.
Wall Decals
Use adhesive permanent vinyl for wall art or quotes. Easy to remove and change.
Tech Skins
Design custom skins for your phone, tablet, or laptop using vinyl.
Shelf and Drawer Liners
Add patterns to shelves or drawers for a fresh look.
Furniture Makeovers
Cover tabletops or dresser drawers with patterned vinyl for a quick update.
Book Covers
Wrap old books in vinyl for a new, stylish look.
Gift Tags and Bookmarks
Cut shapes from sticky roll paper for unique gift tags or bookmarks.
3D Greeting Cards
Layer vinyl shapes with foam pads or glue dots for a raised, 3D effect.
Storage Box Wraps
Decorate storage boxes with vinyl for a matching set.
Pro Tip: For projects that need extra durability, like outdoor signs or car decals, always use adhesive permanent vinyl. It stands up to sunlight, water, and lots of handling.
If you want to remove sticky roll paper or vinyl without damage, try these methods:
Method
Best For
Notes
White vinegar soak
Glass, ceramic, painted wood
Soak a rag in vinegar, press on sticker for 15-30 mins, peel away.
Hair dryer / heat method
Laptops, cars, plastic, vinyl
Use warm air for 30 seconds, then peel gently.
Rubbing alcohol
Glass, metal, plastic
Dissolves stubborn adhesives; test first to avoid damage.
Coconut oil + baking soda paste
Plastic, glass
Mix equal parts, apply, let sit, then rub gently.
Plastic scraper or eraser
Laptops, plastic, wood
Use a plastic scraper to lift sticker, then an eraser for residue.
Sticky roll paper and vinyl have so many uses. You can upgrade photo mats, line drawers, accent wall art, or even design custom tech skins. Try layering vinyl with transfer tape application for multi-color designs. For extra durability, always choose adhesive permanent vinyl and press down the edges well.
Have fun experimenting with different application techniques. The more you practice, the better your results will look and last!
You should choose sticky roll paper that fits your project. Make sure it works with your printer. Always use a clean surface before you stick anything. Smooth out any bubbles so your stickers look nice. You can try different adhesives like Glue Glider Pro or Scotch Quick Dry Adhesive.
Quick Checklist:
Pick the best type for your project
Get your surface ready and clean
Cut your sticky roll paper with care
Stick it on slowly and carefully
Be creative! Show your sticky roll paper ideas or photos in the comments.
FAQ
How do you stop sticky roll paper from peeling off?
Clean your surface first. Press the edges down well. Use a squeegee or ruler to smooth it out. For extra hold, try a little glue on the corners.
Can you print on all types of sticky roll paper?
No, you can't. Some sticky roll paper only works with inkjet printers. Always check the label before you print your design.
What should you do if bubbles appear under your sticker?
Lift the sticker gently.
Smooth it back down with a squeegee.
For small bubbles, poke them with a pin and press out the air.
Sunrise - Professional In Supplying Allkinds Of Paper Products
Sunrise offers 20 years of OEM expertise, comprehensive certifications, and expansive manufacturing capacity across 50,000+ square meters. We serve customers in 120+ countries with reliable after-sales support. Contact Sunrise today to fulfill your paper and paperboard requirements.
Shouguang Sunrise Industry mainly produce and deal in paper products, Specialized in producing PE coated paper, cup fans, lids and more for your sourcing selection.